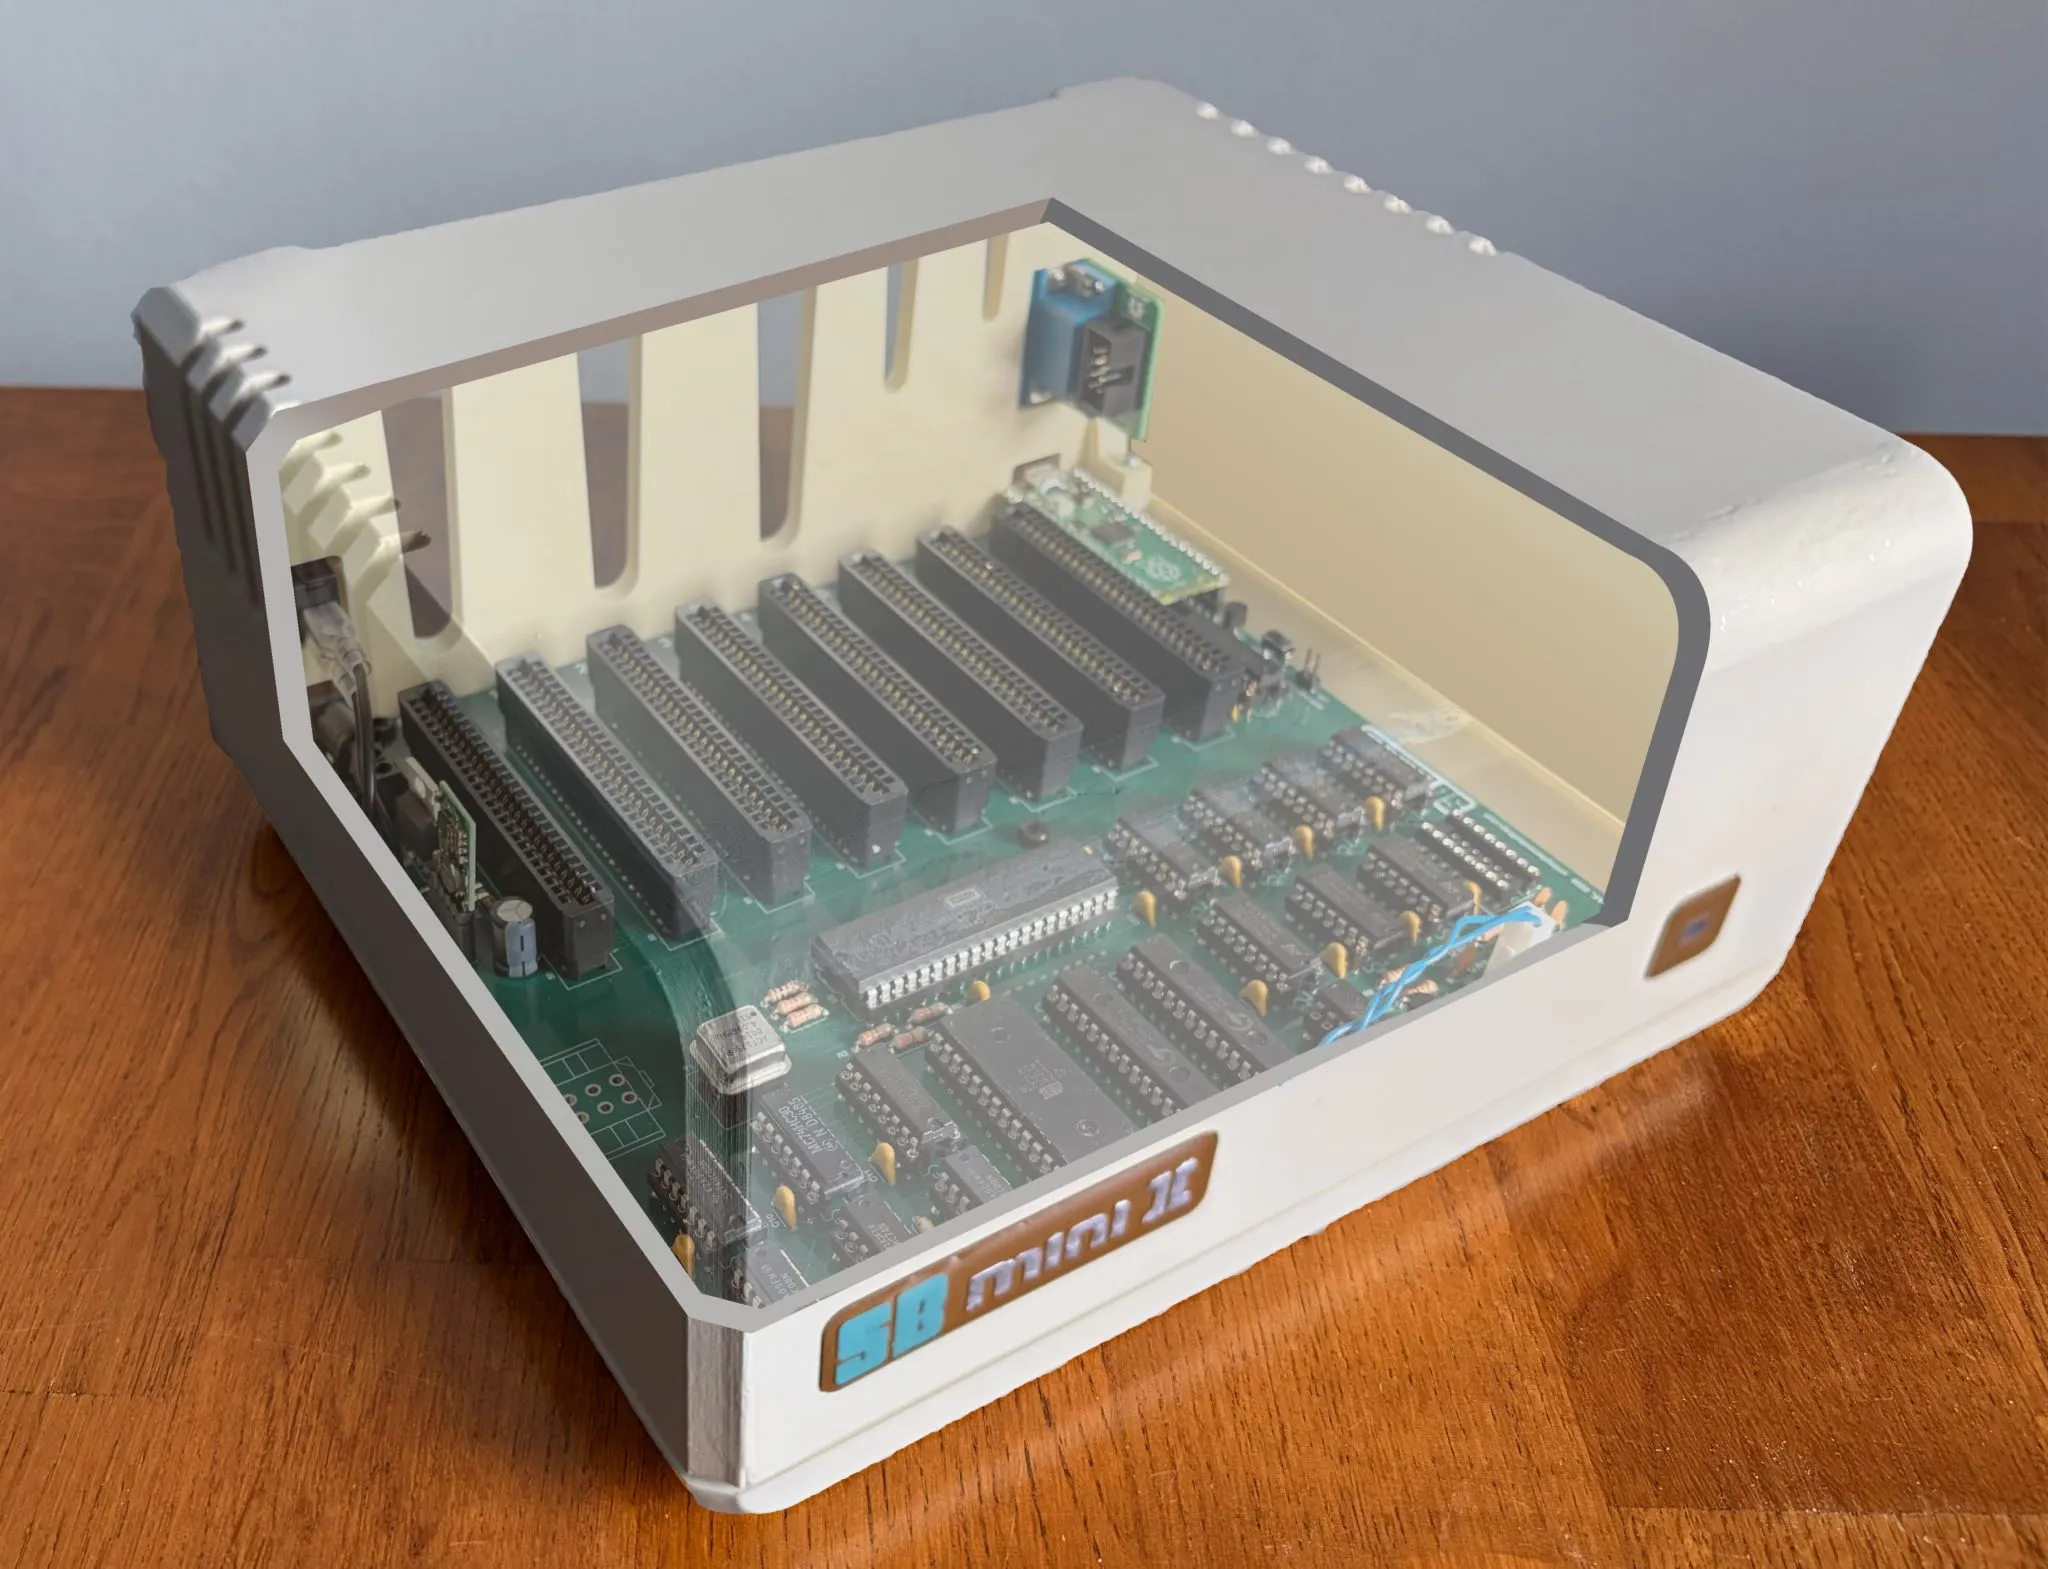
SB mini II: a homebrew Apple II clone
The original Apple II and II Plus computers were built with all off-the-shelf components. It wasn’t until the later models like the IIe that Apple was getting custom chips made which added new features and reduced manufacturing costs.
Many of the basic logic chips, including the 6502 CPU itself, are still available today so I built my own “homebrew clone” of an Apple II Plus. Apple included circuit diagrams in the original manual and entire books have been published describing how the circuits function. There’s no mystery to how the Apple II is put together.
My clone makes use of some modernised alternatives to parts of Steve Wozniak’s original design:
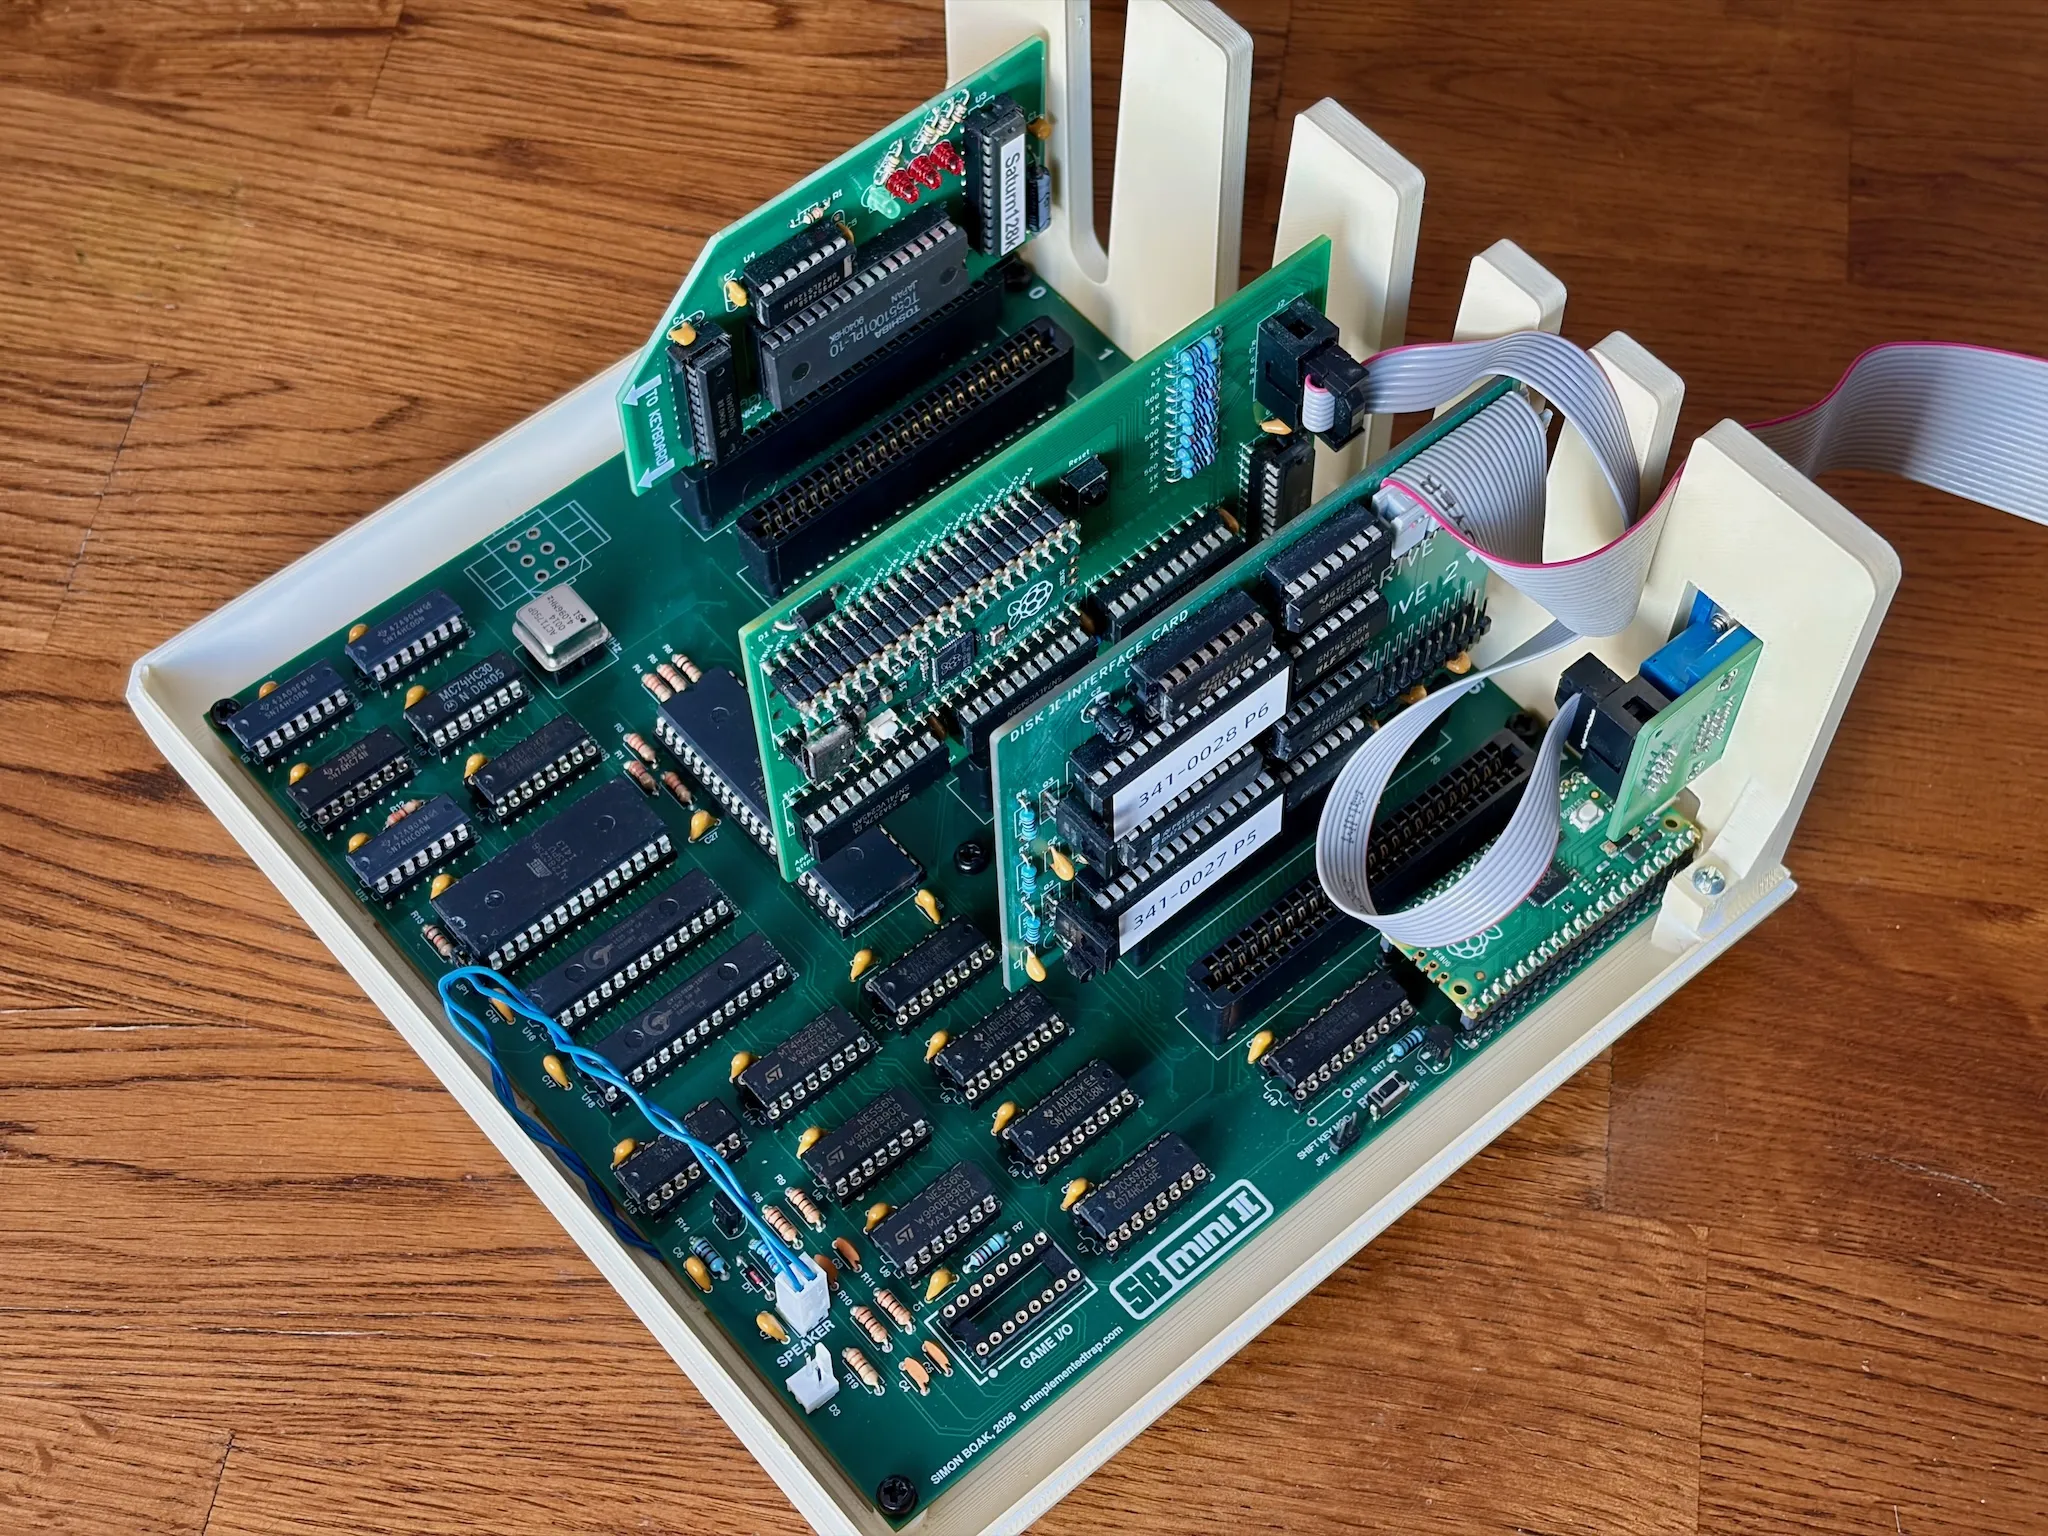
- SRAM replacing DRAM: the original Apple II used dynamic RAM chips as that was more cost effective. But static RAM is now cheap for what this project needed. So cheap that I’m wasting 16 whole kilobytes by using one and a half 32k chips to get the 48k of RAM used on the Apple II Plus. SRAM means I don’t need the circuitry required for refreshing DRAM so that the memory can actually remember. I did make an attempt at implementing a Language Card directly on the board to get the full 64k, but the logic needed doubled the complexity and number of parts. Plugging a replica Saturn 128k card into slot 0 was a better alternative: simpler motherboard design, makes use of one of the slots, and gives me even more memory.
- A lot of the original Apple II circuit is for generating the composite video signal. However, thanks to the Apple II VGA card I can get much sharper video output and it means I can remove all of the video generation logic. In a way this is a “headless” clone as without the VGA card in one of the slots there’s no video output.
- The two points above also mean the clock and timing signals are greatly simplified. I’m using a 4.096 MHz crystal oscillator which is divided down to 1.024 MHz (close enough to the original Apple II which ran at 1.023 MHz).
- A Raspberry Pi Pico is used to connect a USB keyboard for input, although an original ASCII keyboard could be connected instead if desired. The Pico generates the same parallel data signals as the original keyboard. Pressing Control + Print Screen sends a reset signal to the CPU. The Pico also provides a power-on reset signal. Voltage level shifters aren’t needed as the Pico is only driving the logic on the board, and the 3.3V is a good enough input for the CMOS logic used.
Yes, this clone uses CMOS logic, rather than the TTL logic of the original Apple II. I’m mostly using 74HC logic apart from the I/O decoding chips, which are 74HCT138. I’ve not yet encountered any issues with either the replica Disk II or Saturn 128k cards.

Construction
This is the first 4 layer board that I’ve made and it really helped being able to have the power on the internal planes and route all other signals on the outside. Power into the board is 12V with an onboard Pololu regulator for 5V. If the -5V and -12V voltages are ever needed then the PCB has the footprint for an Apple II-compatible power supply connector.
The case is 3D printed from several parts before gluing together and painting. Its design is based on the Apple ProFile hard drive but with the vents and rear panel of the Apple II. Just like the original Apple II the lid clips into place so you can open it up without any tools.
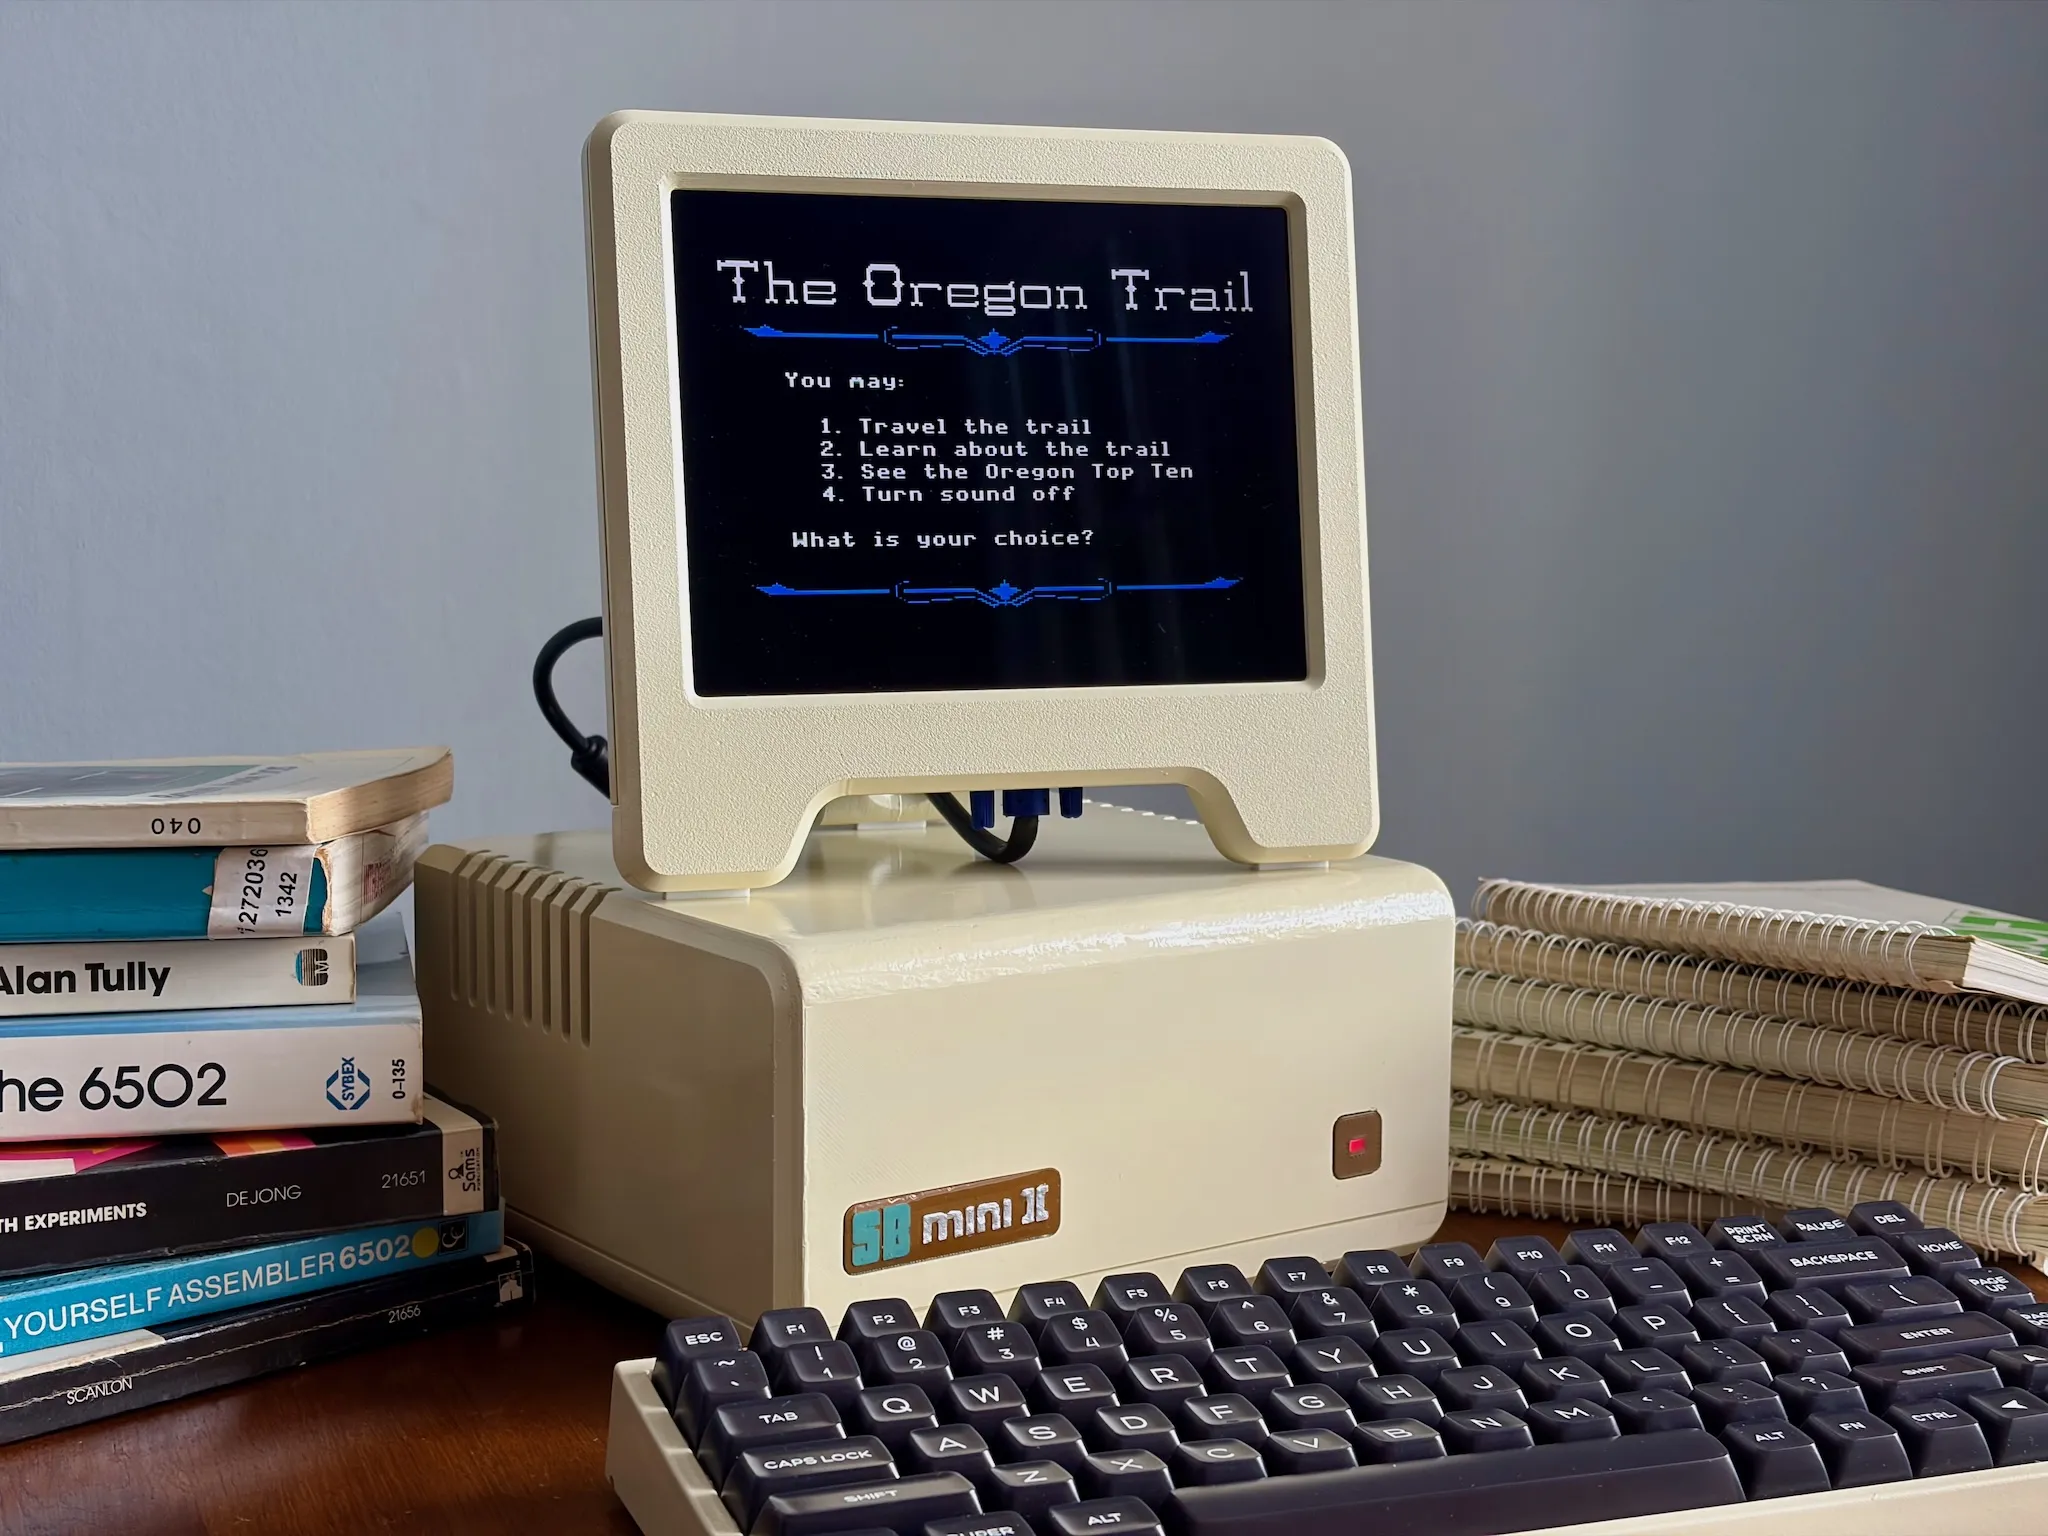
I’ve also designed a matching Studio II LCD monitor for use with this clone.
Inspiration
- Apple 1 Mini by DutchMaker: I’ve built my own one of these before, so building an Apple II seemed the next logical step.
- Retro II by Jon Thomasson: A more complex implementation using Parallax Propellers.
- Baffa 2 by Augusto Baffa: A multi-board and multi-computer system based on the RC2014 bus.
Build your own
Full schematics, BOM, and CAD files are on GitHub →