Unimplemented Trap
Adventures in hardware and software

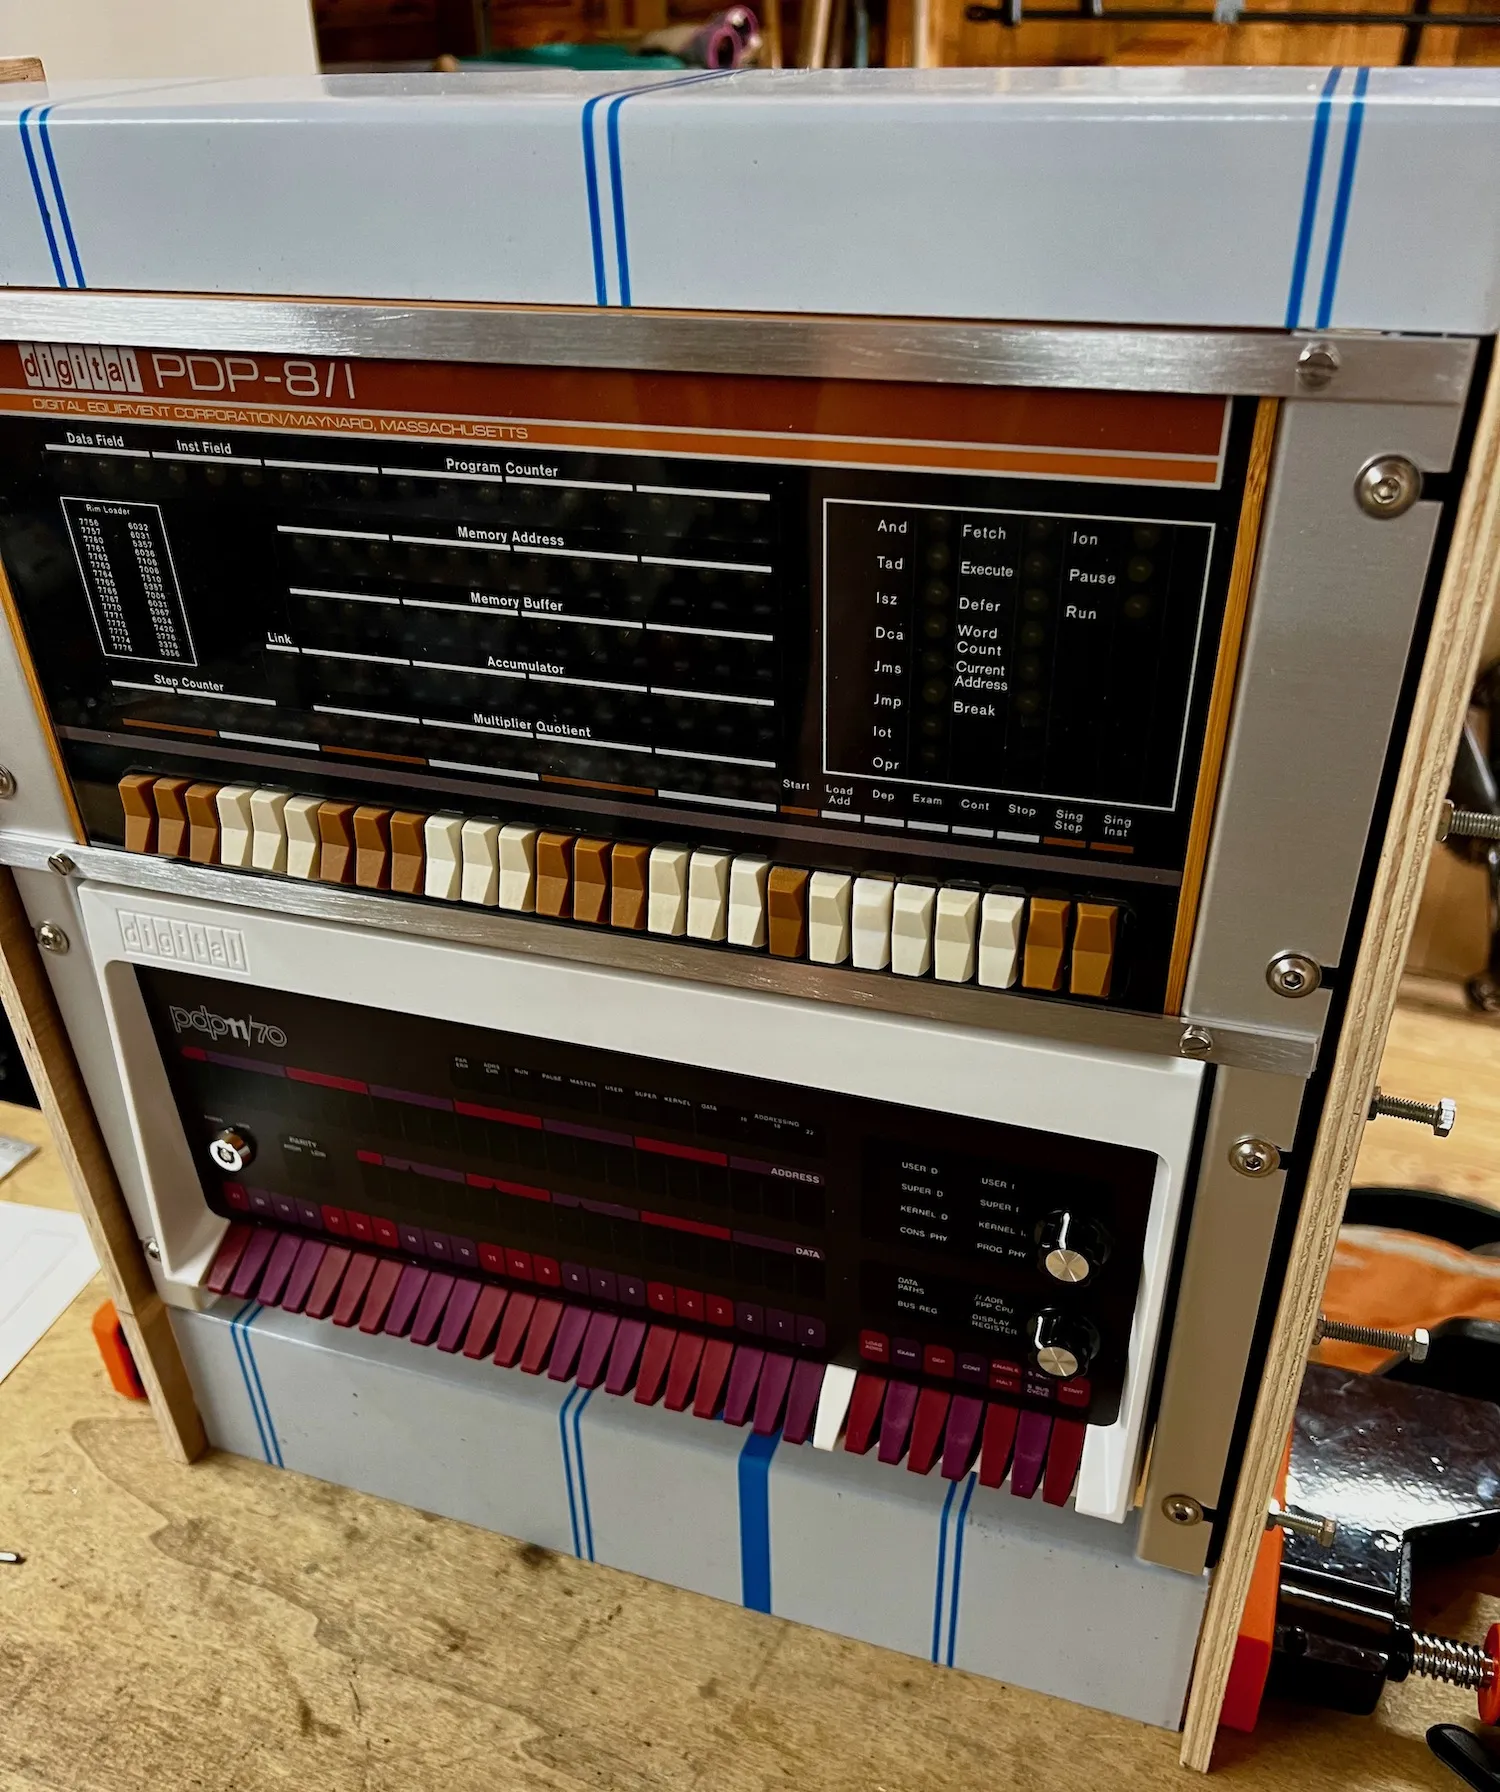
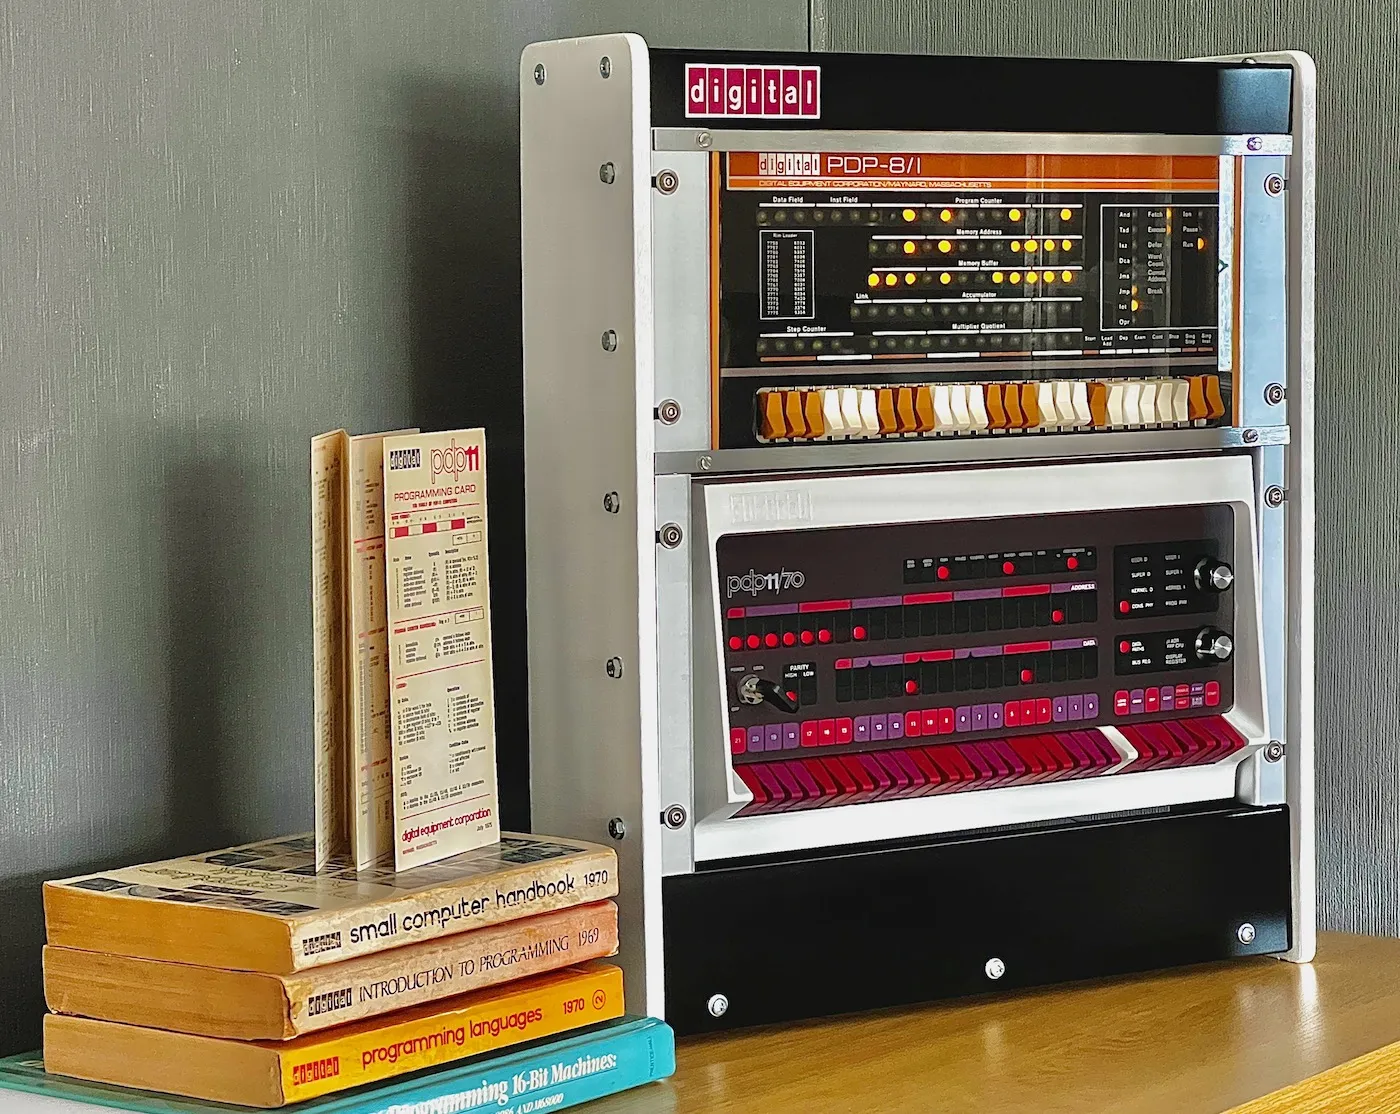
A small cabinet for the PiDP-8 and 11

A project to combine my PiDP-8 and PiDP-11 replicas into their very own scale cabinet. Roughly based on the black and white cabinets made by Digital, I came up with a design with basic parts, simple techniques and built only using off cuts and stuff I already had.

Adding brackets to the PiDP-8.
Click to view full size - Adding brackets to the PiDP-8.

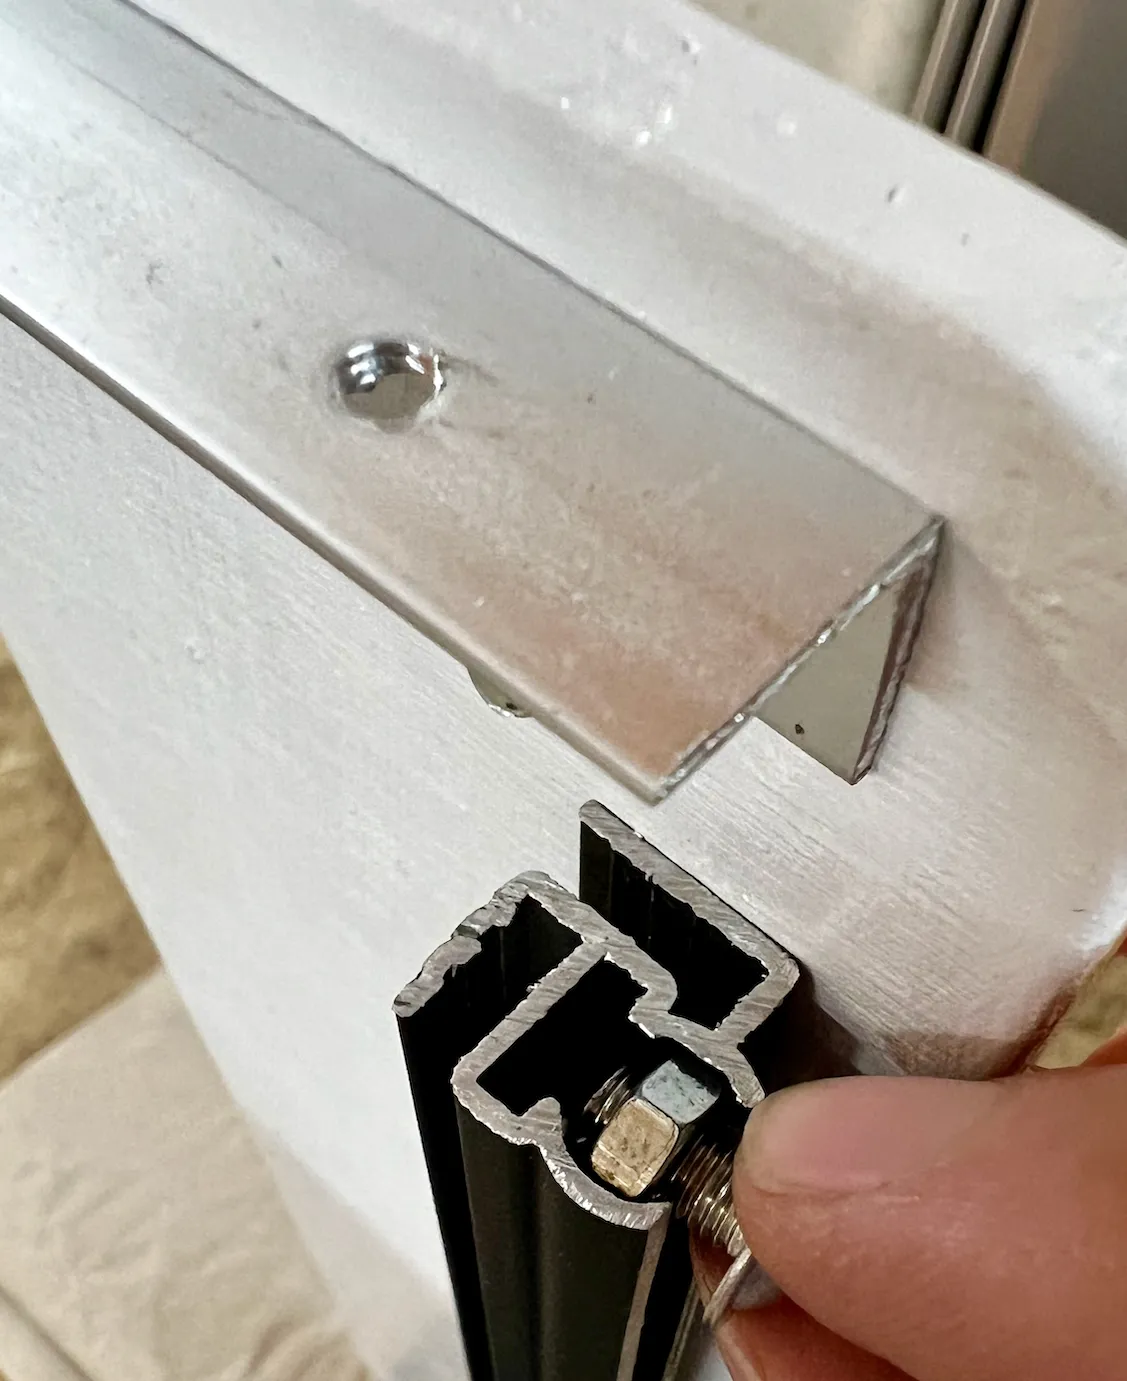
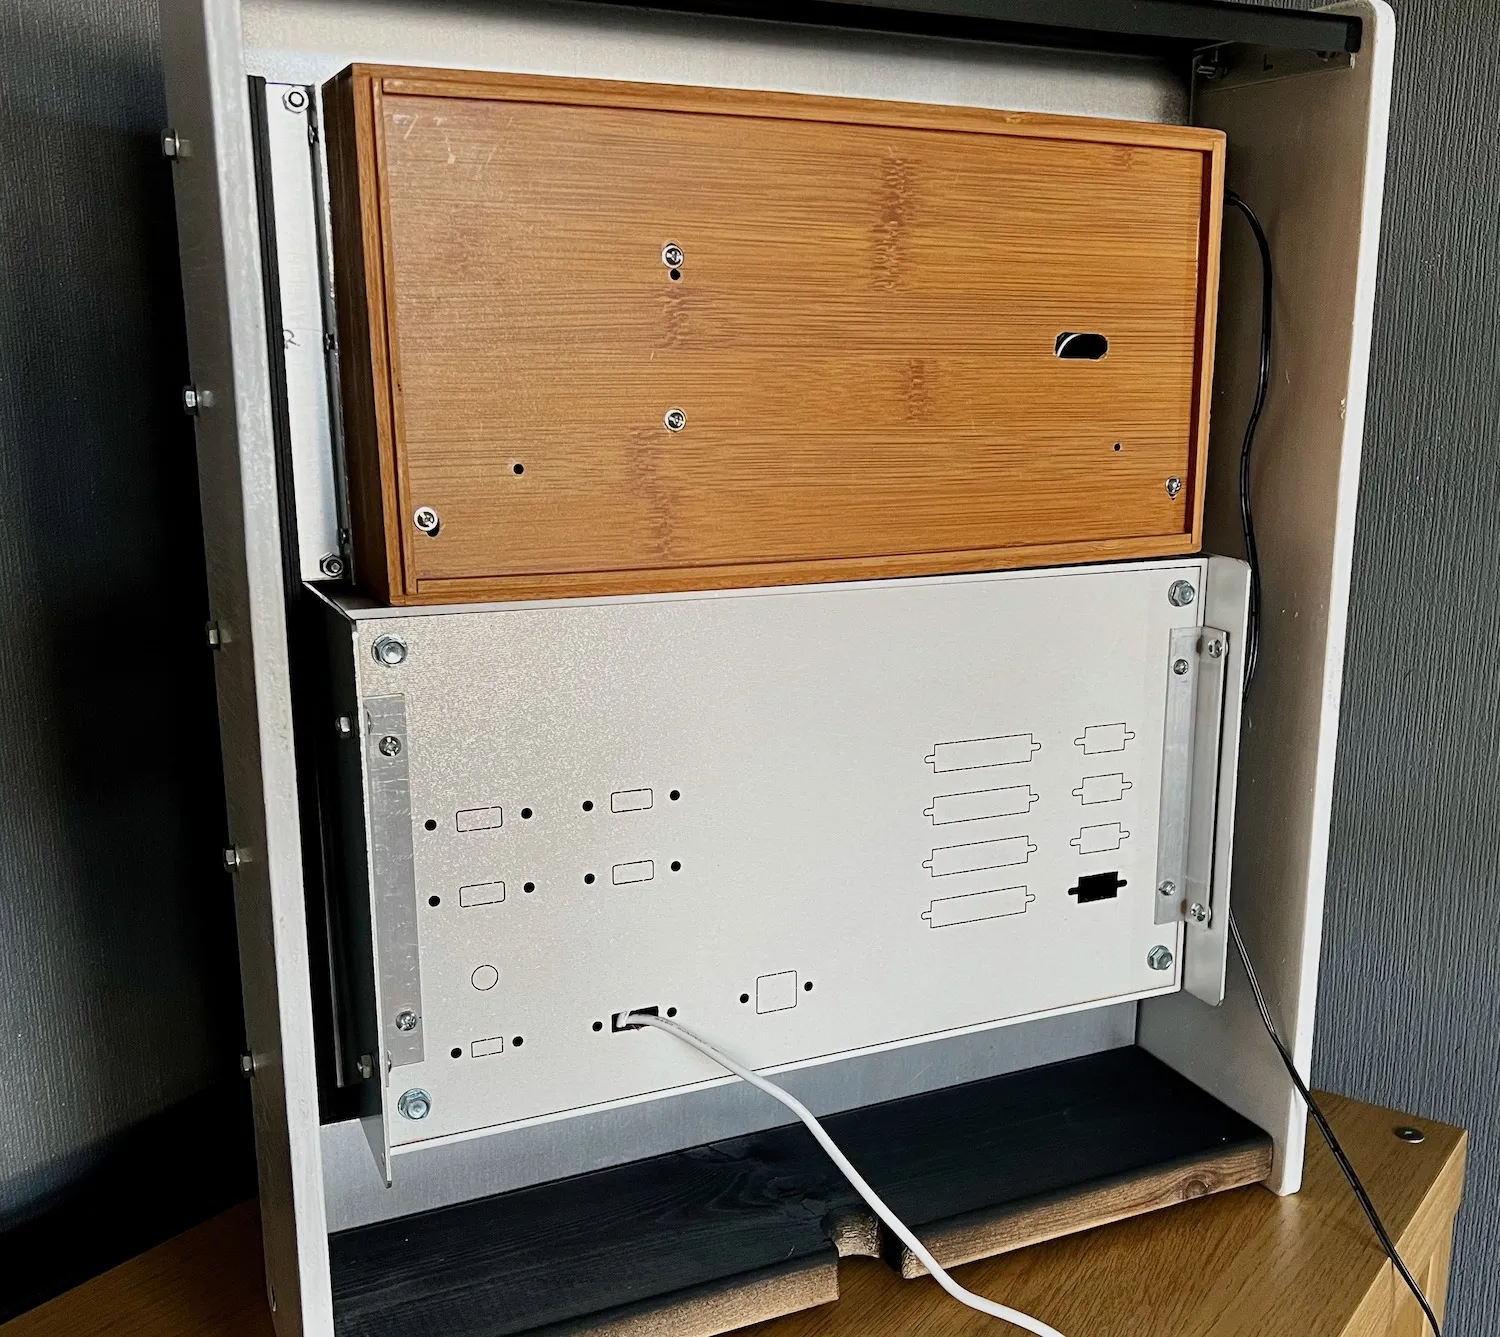
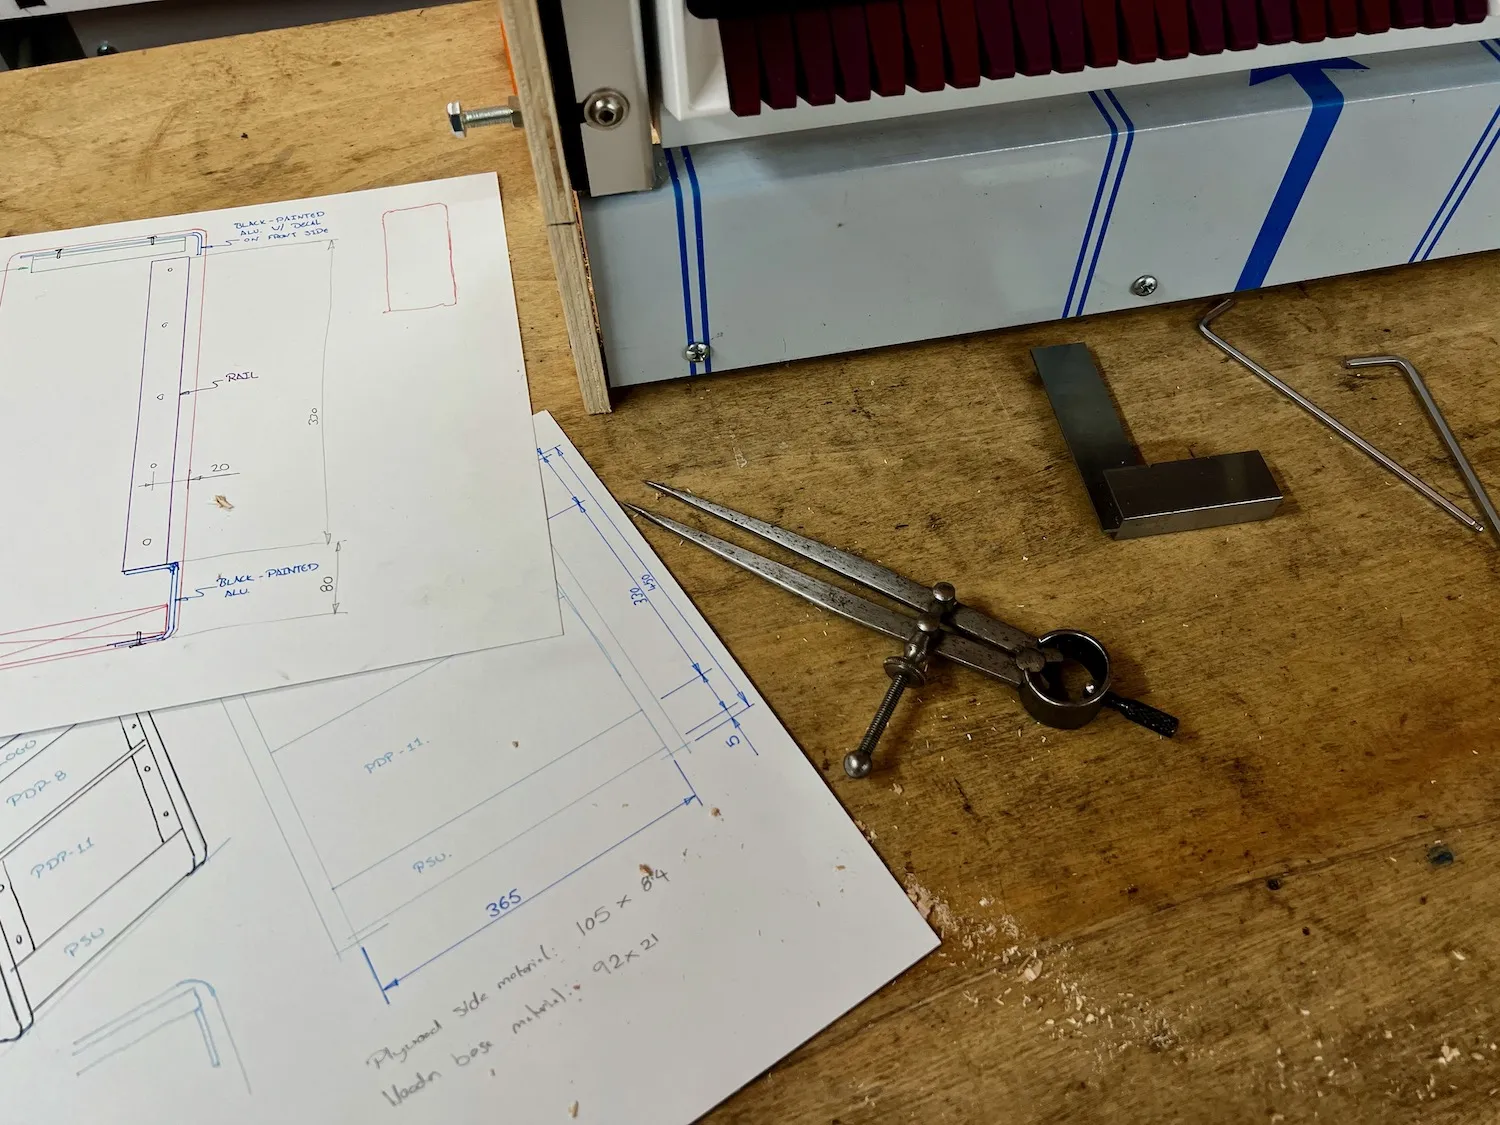
I had these aluminium extrusions (salvaged from slide up advertising banners) which I discovered the round slot was perfect for capturing an M5 sized nut. The rails are a bit fiddly compared to a proper rack mounting system but they do the job. With a couple brackets both PiDPs soon looked the part.

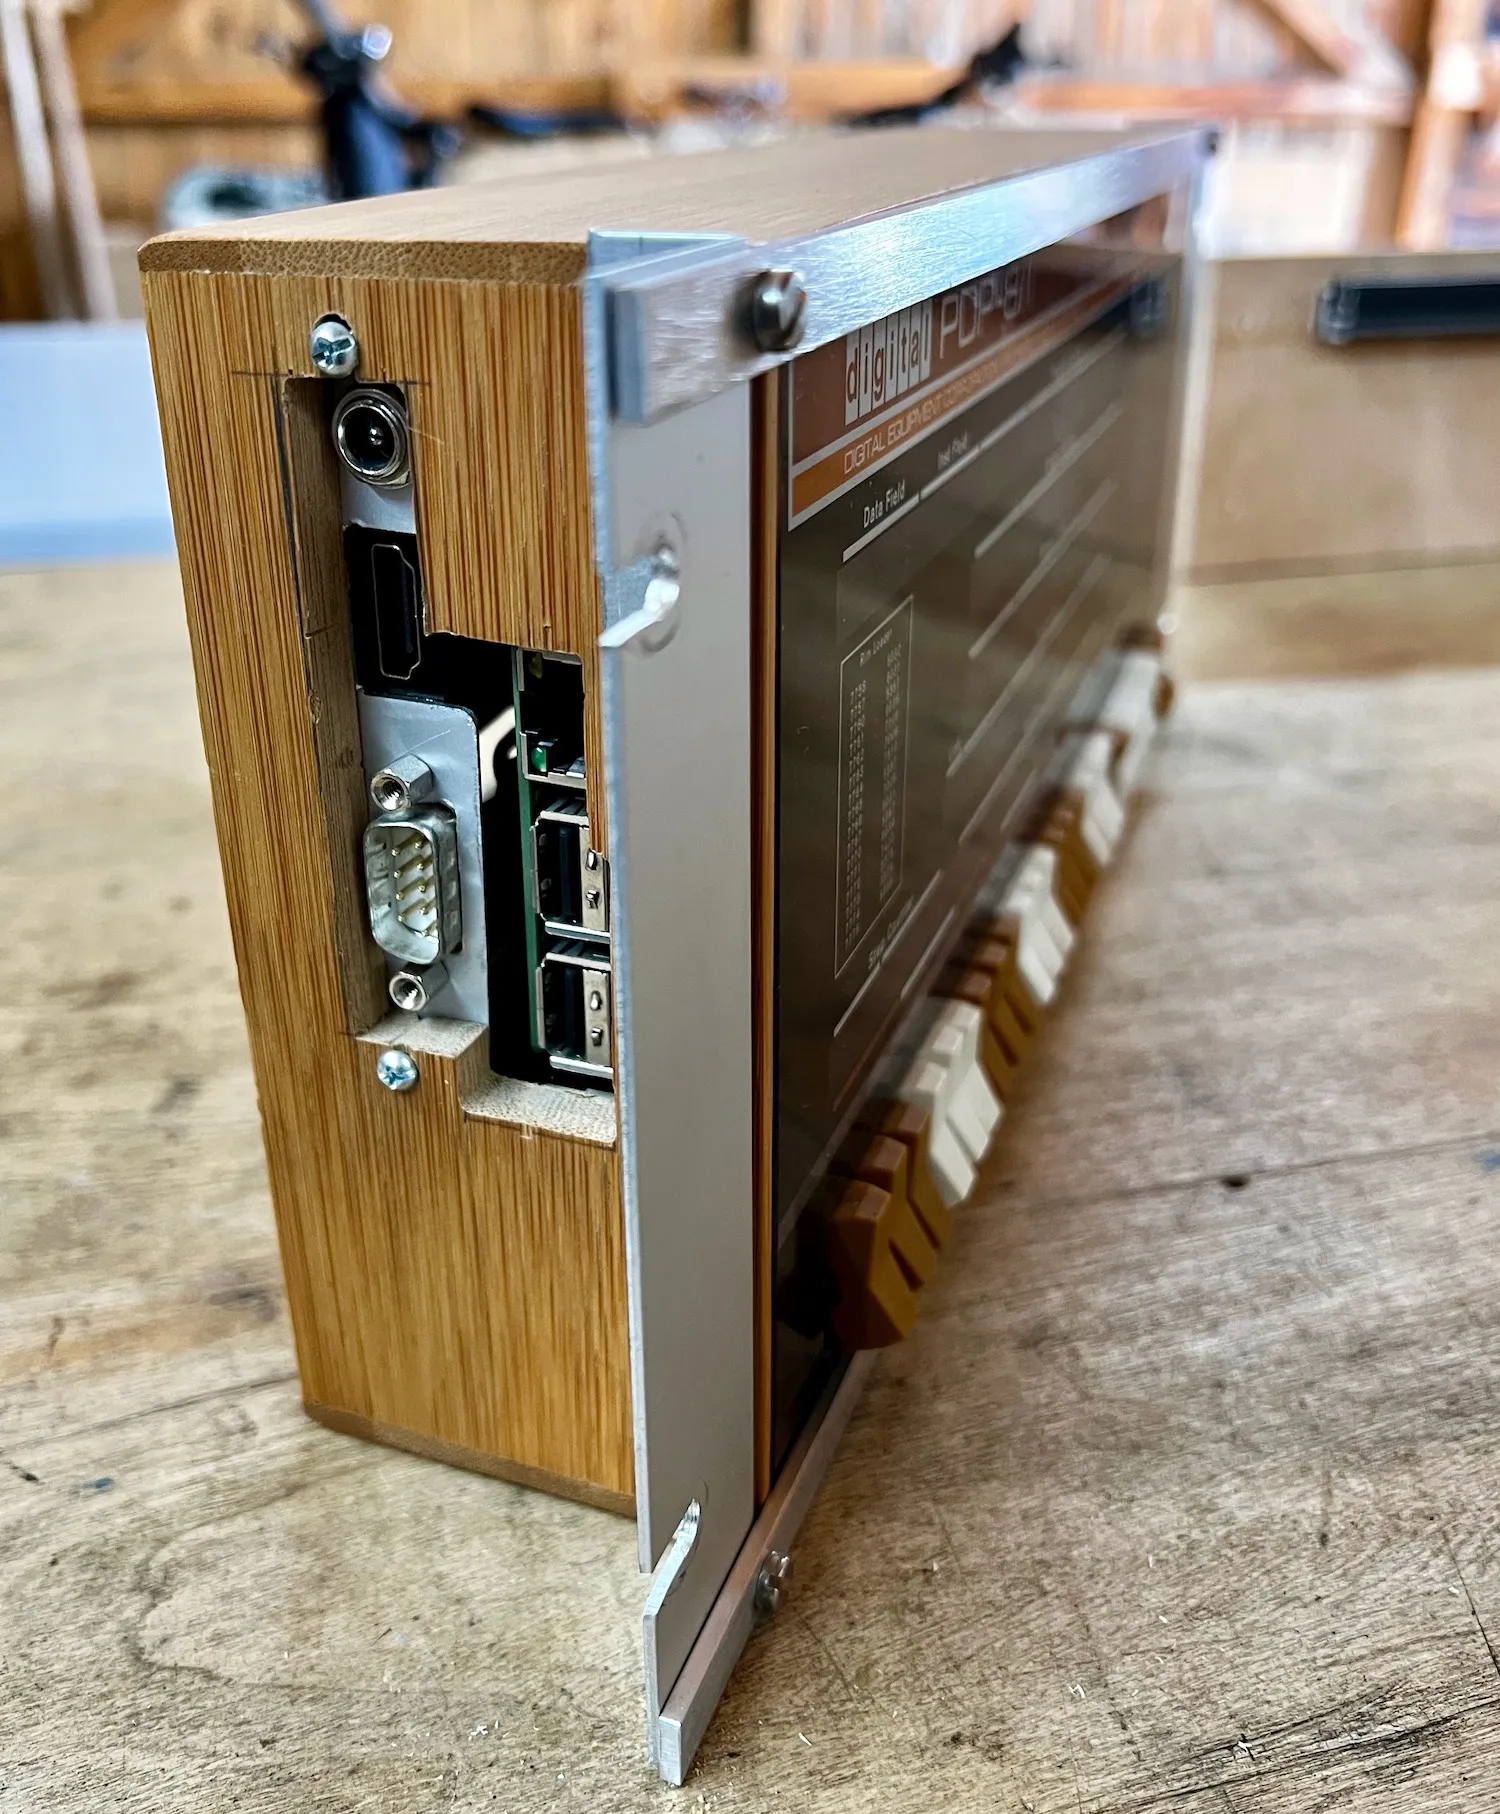
Next time I’d use something like Eurorack strip as with this approach I have to slide everthing in from the top.

Here's how the M5 nuts fit into the slot.
Click to view full size - Here's how the M5 nuts fit into the slot.
First test fit of all the parts before finishing. The sides are old plywood with aluminium sheet for top and bottom panels.
Click to view full size - First test fit of all the parts before finishing. The sides are old plywood with aluminium sheet for top and bottom panels.
View from the back – I still need to get the panel mount connectors for the PiDP-11 but for now all I need is power and able to connect over WiFi. The space at the bottom is left for power supplies and the cutout in the base is there as I'm tempted to wall mount this so will run a cable conduit down from there.
Click to view full size - View from the back – I still need to get the panel mount connectors for the PiDP-11 but for now all I need is power and able to connect over WiFi. The space at the bottom is left for power supplies and the cutout in the base is there as I'm tempted to wall mount this so will run a cable conduit down from there.
Look mum, no CAD! The whole thing was just worked out from a couple of sketches and things adjusted as I went along.
Click to view full size - Look mum, no CAD! The whole thing was just worked out from a couple of sketches and things adjusted as I went along.
The finished cabinet: it's surpringly steady when using the switches on both machines and a lot of fun to watch.
Click to view full size - The finished cabinet: it's surpringly steady when using the switches on both machines and a lot of fun to watch.

Blog home